
This is a sponsored conversation written by me on behalf of Cricut. The opinions and text are all mine.
Learn how to create your own sustainable gift wrap to reuse instead of using buying traditional wrapping paper that ends up in landfills. Easily customize your gift wrap using a Cricut and the Easy Press 2. You’ll also find a full review of the Easy Press 2 in this post. This post may contain affiliate links, which help to support this site at no extra cost to you.

I’m so excited to share this sustainable gift wrap idea with you. A few years ago I read an article about how terrible wrapping paper is for the environment, and since then have slowly been figuring out ways I could reduce my own gift wrap waste.
The first year I made my own designs on recyclable wrapping paper. I was happy with how it turned out, but quickly realized that the paper usually still ended up in a normal trash bag after holiday celebrations. So while it was a little better, overall it didn’t help the environment much.
So last year I decided to buy some material and cut it to size to cover my gifts. That worked great! I was kind of the crazy lady at the holiday parties. I had no trouble gathering my material back up after presents were opened so they’re super easy to reuse over and over.
No one wanted to keep the material as part of their gift, but if someone did, I’d totally be ok with it. I’d love to convert more people to using less traditional gift wrap.
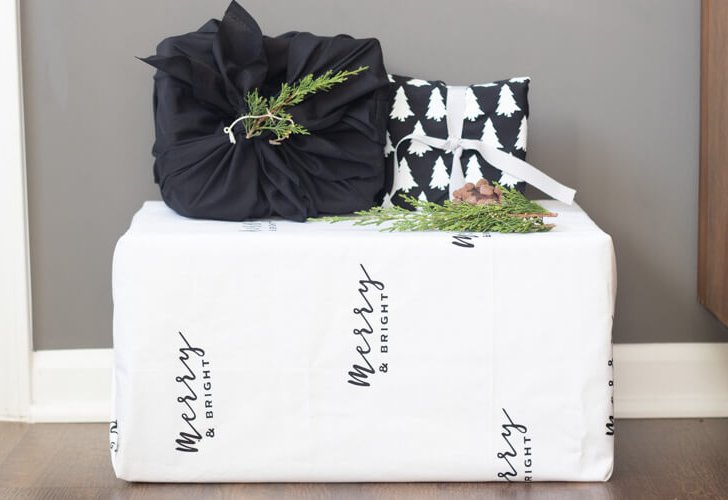
This year I thought it would be fun to take it a step further and put my own patterns on the material using my Cricut.
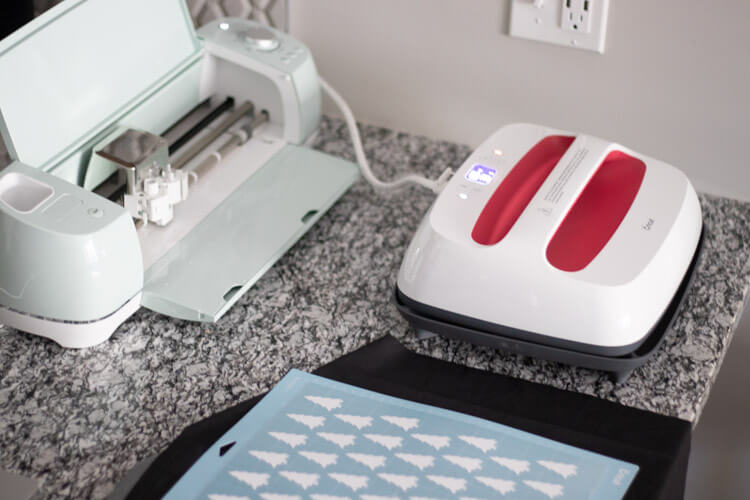
What you’ll need:
- 2-3 yards of black and white material – I used a cotton-poly blend
- Iron on vinyl in black and white
- Cricut machine
- Easy Press 2
How to make DIY sustainable gift wrap
So for this project you’re just going to pick out a design to put on your material, cut it with your Cricut, then use the Easy Press 2 to iron it on to the material. It’s a super simple project and the options are limitless.
I started by laying my “gifts” onto the material and cutting out the amount that I needed to wrap it.
How to create your design
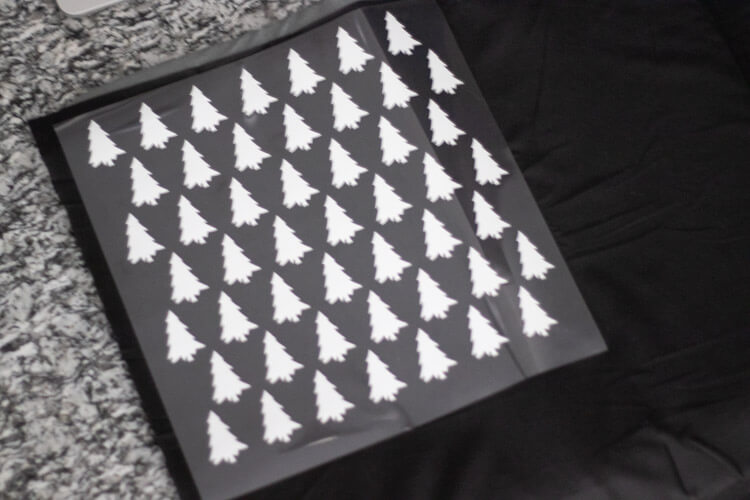
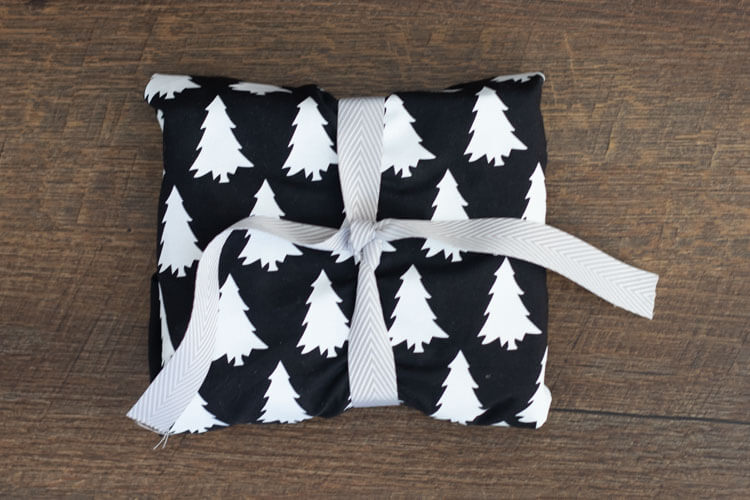
I decided to test out 2 different designs. I grabbed both of them from the Cricut Design Studio Library. For the first one, I chose a simple evergreen tree shape and created a pattern with it by copy and pasting it a few times to create the top row. Then I selected the entire row of trees and copy and pasted that to create the next line.
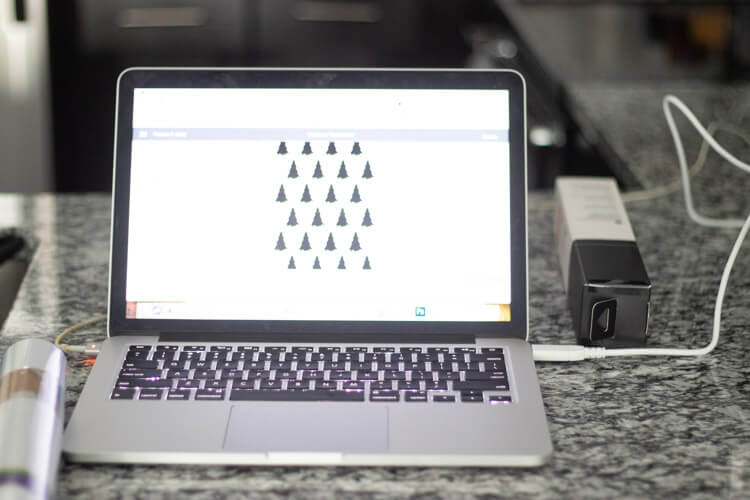
I’m sure there’s an easier way to do this, but I’m fairly new to the Cricut Design Studio. This method worked for me. I toggled back and forth between my design and the “make it” view to see how much space I had left to fill on my sheet of vinyl.
If you’re creating a pattern like this, you’ll want to be sure to group and attach the images so they don’t get rearranged before you cut.
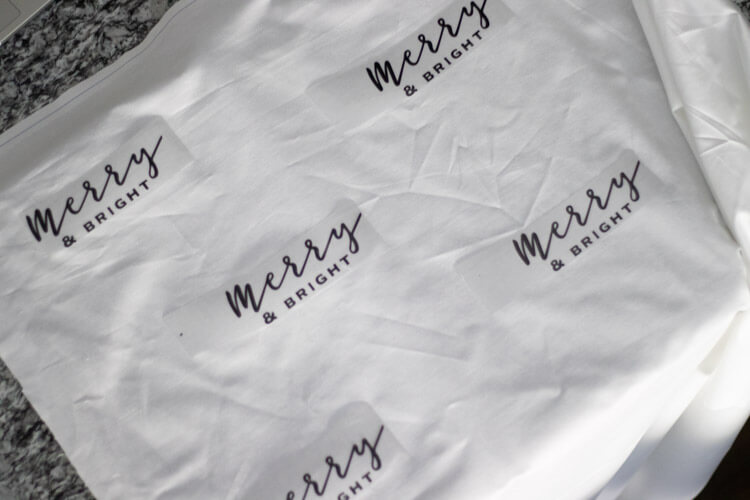
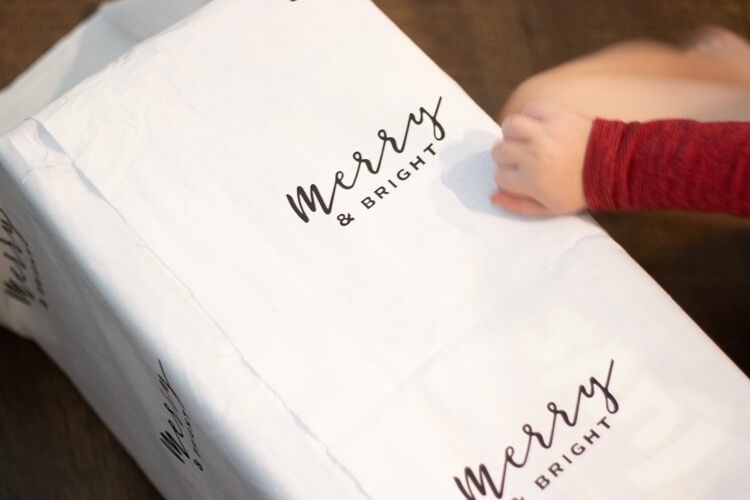
For my second design, I chose a “merry & bright” image and copied and pasted it for a total of 12 on the sheet. I didn’t group or attach the images because I planned to cut each image out so I could place them individually on the material and choose my own spacing.
Cut the design on your Cricut
Once you’re happy with your design, follow the steps to cut it with your Cricut. Don’t forget to mirror your image and stick your vinyl shiny side down. I accidentally cut one the merry & bright designs without mirroring and it took quite a while to cut. So disappointing to see I hadn’t followed directions!
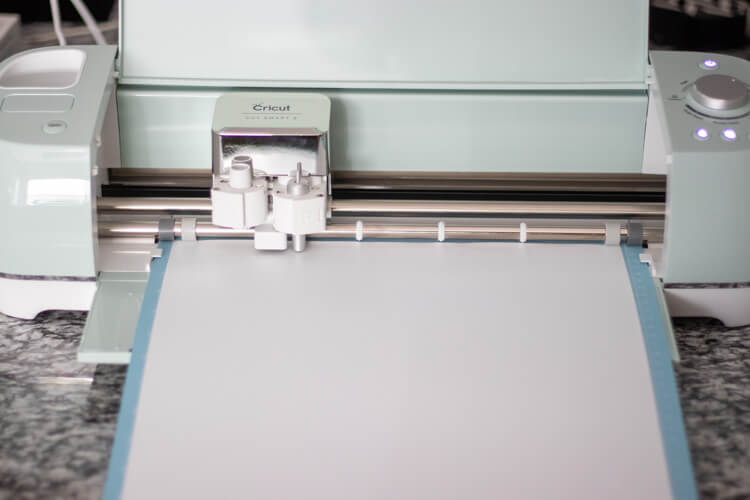
Once it’s done cutting, weed all the negative space off your vinyl so you’re left with your design.
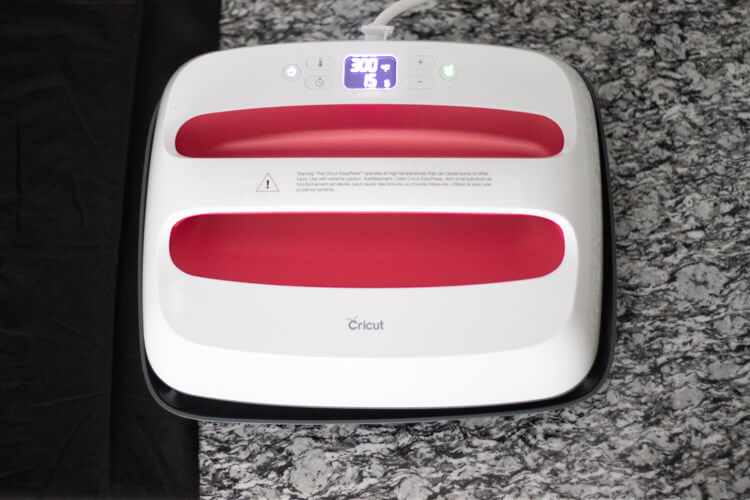
Iron on your designs with the Easy Press 2
I’m so glad I get to use the Easy Press 2 instead of a normal iron to adhere the vinyl. It takes all the guesswork out the process and makes it super simple.
All you have to do is look up which setting to use for the material you’re using, then set the temperature and timer. For these cotton-poly blend materials, I set my temperature to 300 and the timer to 15 seconds.
You can use a towel to protect the surface you’re working on, but I suggest investing in the mat that’s specifically made for the Easy Press. It’s just one less thing to find and straighten out. I just keep it on the cart with the rest of my Cricut supplies and am ready to go when I need it.
The instructions for operating the Easy Press 2 are super straightforward and it’s really intuitive to work with. Just press it down on your design and hit the timer button. After your timer beeps, flip it over and press down on the other side for about 15 seconds.
The heat guide recommended I remove the backing while it’s still warm, but I noticed it is possible to try to take it off too soon. It’s best to let it cool for a couple minutes, then it will peel right off and you’ll see the results of your hard work.
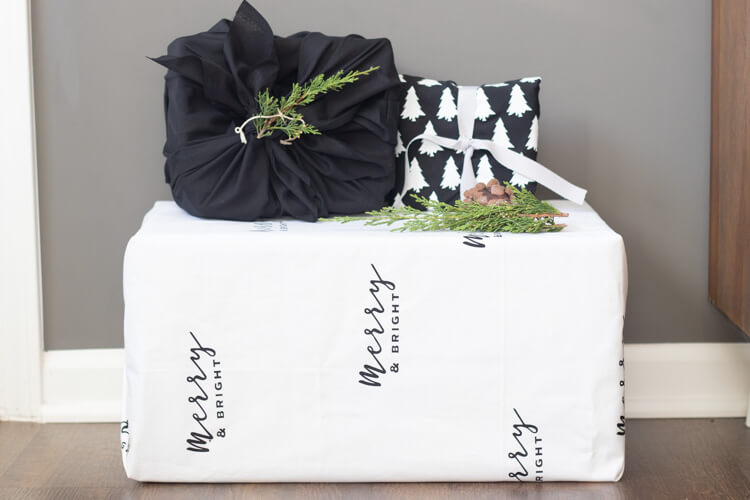
That’s it! Once you cover your material with your designs, you’re ready to admire your new gift wrap get to wrapping presents.
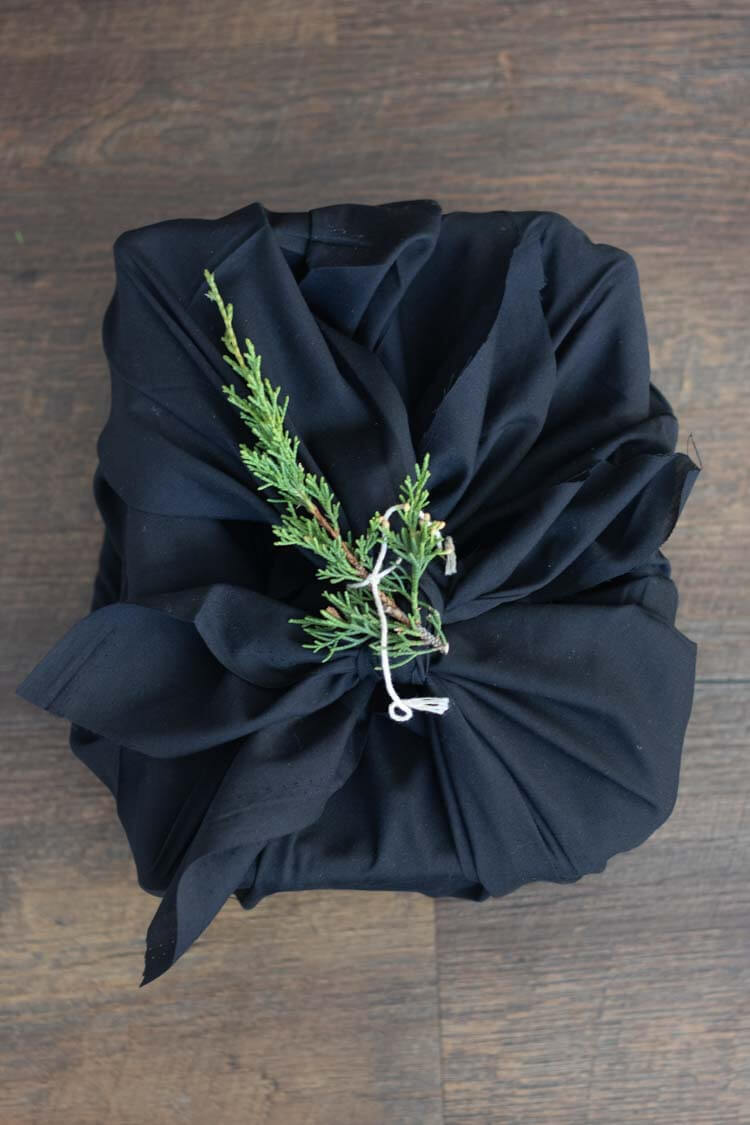
Using Sustainable Gift Wrap
One thing I struggled with last year, as silly as it was, was how to secure this material around a present. So I have a few solutions for you.
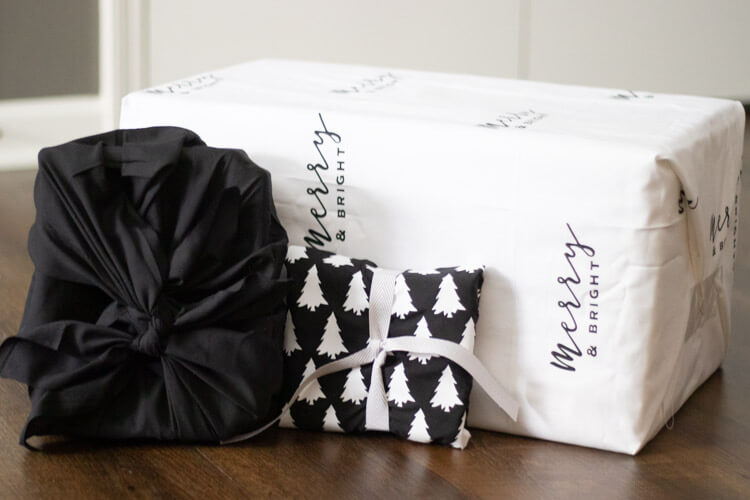
The easiest way to do it is with string. It’s just the beginning of November here, so I haven’t dug out my Christmas supplies yet. But I usually have some different kinds of twine and string available to tie them up with.
It is kind of difficult to get everything as perfectly wrapped as you can with traditional wrapping paper, but I find the imperfections kind of charming.
I also love the look of just pulling up the corners and knotting them together. Definitely not a perfectionist look but so cute!
You can also use safety pins to hold the material in place, but be sure to mention them before your recipients open their gifts. Most people are used to tearing through paper and won’t be expecting to unpin a safety pin.
Lastly, you can certainly use tape to secure it just like you would traditionally. Tape isn’t really environmentally friendly but you’ll be reducing so much waste by forgoing the paper. It’s a step in the right direction that you can work on improving going forward. Using sustainable gift wrap is definitely a step in the right direction!
Want more Cricut projects?
- This cute trick or treat bags are simple and sustainable.
- Here’s a fun way to add a little extra to your planters using your Cricut.
- And 5 reasons I love my Cricut.

Diana
Sunday 3rd of November 2019
I think your gift wrap turned out so nice. I don’t have a Cricut but it has given me pause to think about how I might be creative in other ways. You are planting seeds with others when you wrap your gifts this way. I’m sure it motivate others to give the idea some thought. Great post. Thank you!