This is a sponsored conversation written by me on behalf of Cricut. The opinions and text are all mine.
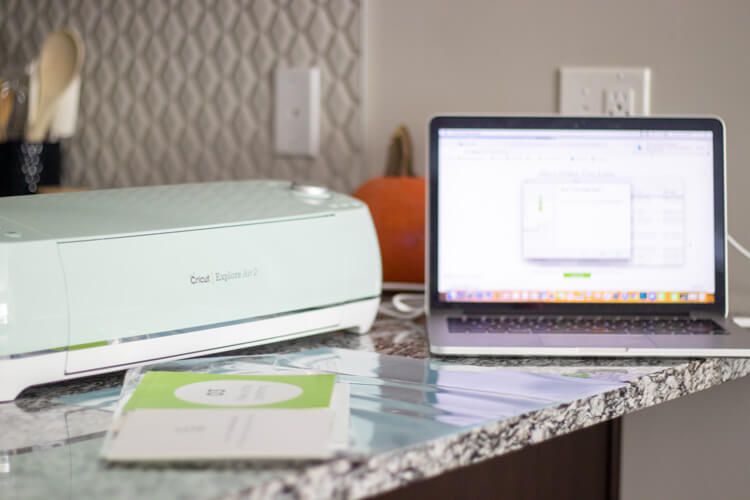
This is my Cricut Explore Air 2 review as a first-time Cricut user. I made a couple canvas trick or treat bags for my kids as my first projects to get more familiar with the machine and test out some of the features.
I have been wanting a Cricut ever since pinterest blew up with alllll the adorable farmhouse signs I wasn’t talented enough to freehand, but I’m just now getting my hands on one. I’m so excited to use it for all the things, but it’s probably a good thing I didn’t get it when I was obsessed with barn wood. Ha! Now I’m a little more selective about the things that I craft (which is actually hardly ever), but there’s still tons of awesome plans I have for this Cricut. I’ll get more into the features in a bit.
I decided to start off with something simple. Since Halloween is right around the corner, I figured I’d make the kids some reusable trick or treat bags. The plastic ones always break on us and I’m trying to stick to more reusable things as much as possible. So I’m hoping these are classic enough that the kids can use them for the next few years at least.

Setting up the Cricut Explore Air 2
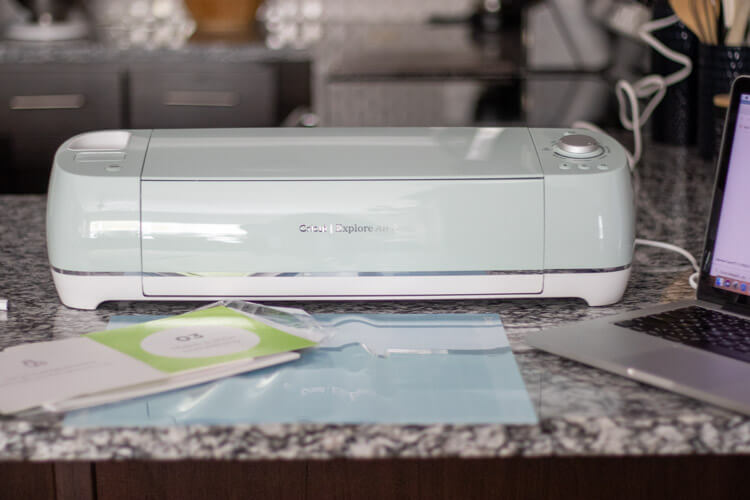
So like I said, I’ve never used a Cricut before. At first glance, this thing was pretty intimidating. I had 4 boxes of stuff to open. The Cricut Explore Air 2, the Easy Press 2, a mat for the press and a box of starter supplies for the Cricut. I was a little unsure of where to start until I saw these giant green cards with steps on them in an enveloped labeled “Let’s get started.”
Seriously probably the most genius thing about this first-time user experience. I know I could start reading the manual, but that just feels like a lot. This cards were perfect.
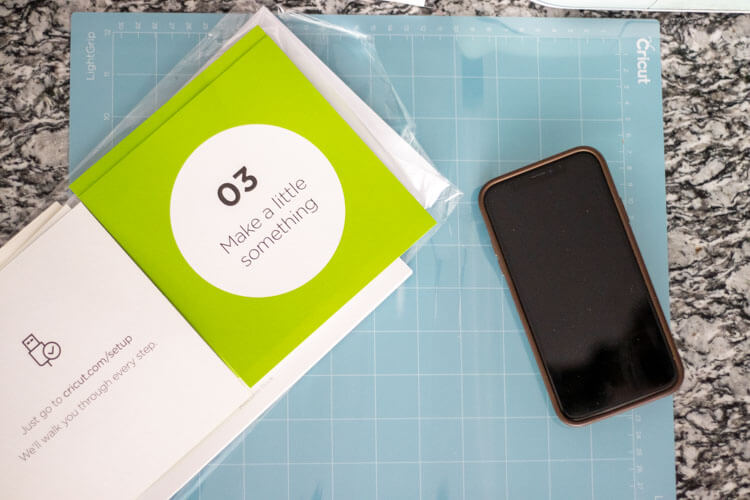
They give you super simple steps to get your Cricut hooked up to your computer and then there are step by step instructions on your computer to make a small project out of the cardstock paper included in your box.
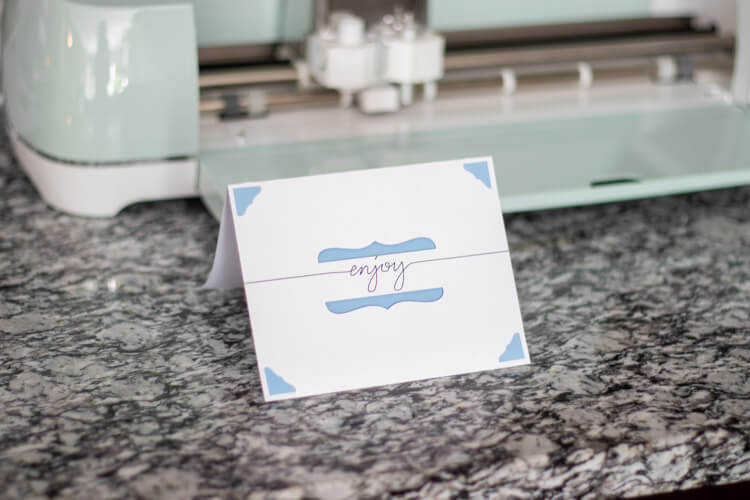
That was also pretty cool because it quickly walks you through the basic steps you’ll use every time you create a project. Mine came with this little “enjoy” card. The instructions explained how to use the mat you need for all projects, how to load the machine, what the buttons all mean and the correct way to peel your projects back off the mat so they don’t curl up. Super handy.
I recommend knocking out the included project rather than skipping it. It doesn’t take long at all and gives you a lot of basic knowledge about the machine.
What can the Cricut Explore Air 2 make?
To be honest, I’m pretty sure I’m just at the tip of the iceberg in understanding the capabilities of this machine. On the top of the machine, there’s a dial so you can select the material you’e using and the ones you can choose from are paper, vinyl, iron-on, light cardstock, cardstock, bonded fabric, poster board and custom.
From the videos I watch I know the Cricut can also score your materials so that you have fold lines. That would be useful for cards but also for things that would eventually come together to make 3D objects.
The options are truly limitless with just the above materials, and the custom options lets you do even more things! I know it’s capable cutting leather and I’m excited to try that one out sometime soon!
A couple good places to start to come up with new ideas for what you can make are the libraries in the designer studio and the Youtube channel. I know I’ll be referring you to that channel a lot, but it truly is a gold mine.
The easiest way to learn about the designer studio and cutting capabilities
Once you register your Cricut automatically through the set up, you’ll get an email that leads you to some tutorials about using the design studio. These are all hosted on Youtube.
I’m so glad I went ahead and spent some time watching the 33 short videos included in that lesson. They explain all the features of the design studio and most of the videos are only 1-3 minutes long. Totally worth the time!
Most of the features are pretty intuitive, but I still think the videos are worth the watch. The most valuable part of them for me was realizing that I can and should use the Cricut Youtube channel for any questions I had.
Since I know I’d be using an iron-on design for my first real project, I just searched the Youtube channel for “iron-on” and a 3-part tutorial for creating a t-shirt came up that was perfect. I used it to make the project I’m about to show you.
The lessons are super short and straight to the point and easy to follow. You can watch as you work on your own project. I highly recommend taking advantage of this as you try new things!
How to create an iron-on trick or treat bag design
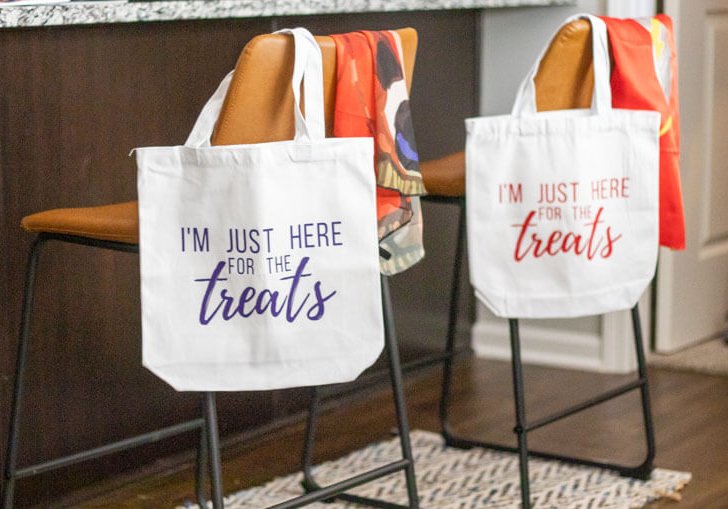
First I searched the pre-created designs in the images section of the designer studio. When I didn’t find anything like what I had in mind, I just decided to keep things simple and use the text feature to create my own design. I ended up coming up with this “I’m just here for the treats” design. Sounds like my kids!
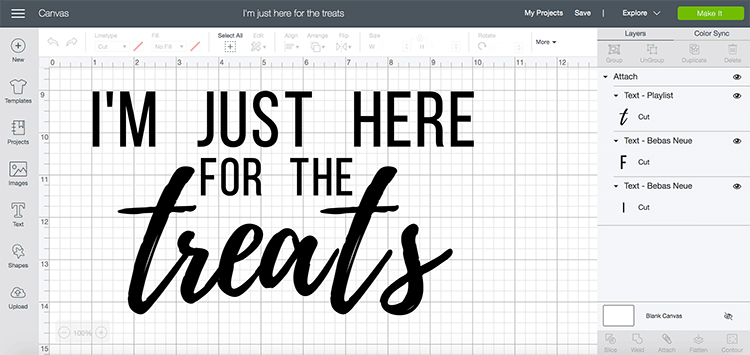
I continued to follow along with the Youtube tutorial to learn how to attach all the elements of the design so they’re cut in this exact grouping.
I found out that if you don’t attach them, the Cricut will rearrange them to use the least about of cutting material possible. Which is great if you’re making stickers or something that isn’t going to be ironed on to a shirt. But for this project, I definitely wanted everything to be grouped together.
When you’re ready you just hit the green “Make it” button in the top right corner. Then your computer will connect with the machine and continue to walk you through the steps of loading your supplies and material and doing the cutting. If you’re doing an iron on design, be sure to mirror your image before cutting. This way your design isn’t backwards when you put it on.
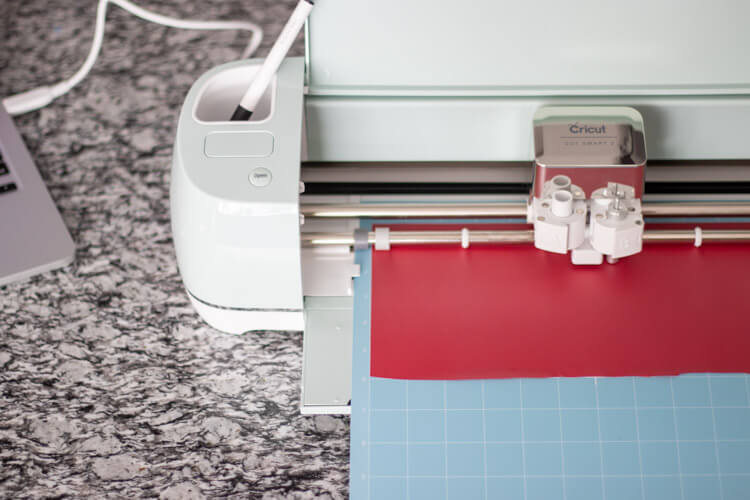
The Youtube videos give lots of helpful tips as you go along like trimming down your material so you don’t waste an entire sheet if you design only use half a sheet. Super smart!
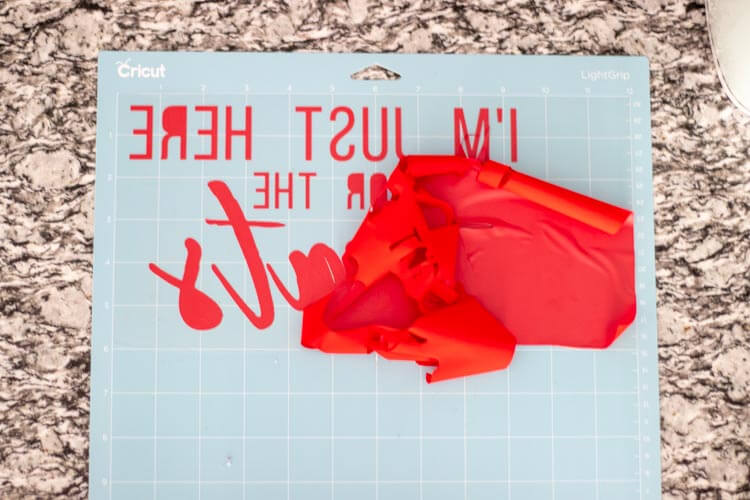
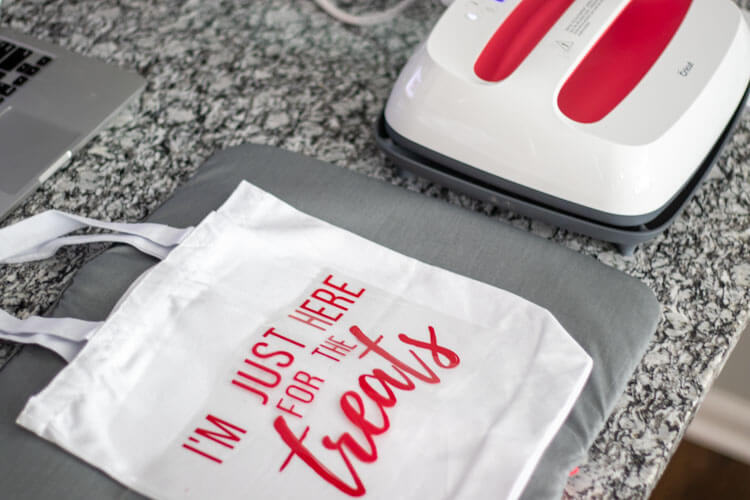
Once it’s done cutting, you just have to weed or peel away the outer film to reveal your design. Then you’re ready to iron on the design, or use the Easy Press to adhere it.
Using the Cricut Easy Press 2
The Easy Press 2 is basically a giant iron with the added features of being able to control the exact temperature and set a timer so you apply the heat for the right amount of time.
I found it super easy to figure out and had it up and running within a matter of minutes. There’s also Youtube video tutorials for this and a super easy to follow user’s manual that you can go through the first time. I used both just to be safe and had absolutely no issues.
You can look up which settings you need given the materials you’re working with. For canvas, mine needed to be set to 315 degrees F for 30 seconds.
The first time I tried I just sat the press on the design and didn’t apply any pressure. That didn’t work out great. It was definitely a user error because the instructions say to press down lightly on the press with your hand. So just know, you should definitely do that. Ha! The second time it worked much better and the backing came off with no issues.
They recommend you hold the press down for the allotted amount of time on top of your design. Then flip your project over and hold the press down on the back side for 15 seconds. This helps make sure everything adheres properly from both sides. Then you just wait for the backing to cool and slowly pull it off. Easy peasy!
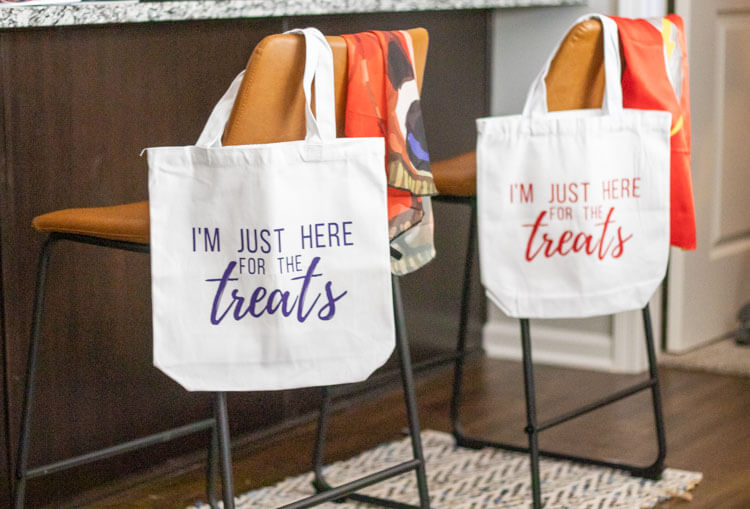
I’m pretty happy with how these turned out. By the way, these canvas bags are the small 13.5×13.5 ones from Michaels and I got them for under $5. Not too bad!
Graham loves red and will want the red one. Let’s just hope Quinny loves purple as she gets older since she can’t tell me her favorite color yet. I think they turned out super cute so I’m calling this a successful first project!

Overall impression of the Cricut Explore Air 2
If I haven’t made it clear up til this point in my Cricut Explore Air 2 review, I was definitely impressed by how easy the Cricut Explore Air 2 was to use. I have never even seen someone else use a Cricut in person before. So I had absolutely no expectations of how this would work. But the Cricut team is great at what they do and they’ve made it so simple to get things set up and get you creating in no time.
The Youtube channel is so full of information from what you’re machine is capable of to step by step instructions to tons of different projects. It’s definitely a resource you’ll want to take advantage of as you get more familiar with everything.
The libraries inside the designer studio are also full of premade projects. These are ready to print and can also be customized to your own tastes. The options are limitless with the Cricut machine and I’m so excited to keep creating with it!
Want more Cricut Posts?
- Make your own reusable gift wrap with Cricut
- Use Your Cricut to Personalize Your Planters
- 5 Things I Love About My Cricut Explore Air 2